Thursday, November 17, 2011

Final Project: Untitled

DAMN SIANZ (Reflection)

It's a fun journey. I learned so many new photoshop techniques and I am proud to say I've finally been able to construct a believable layout that is well-blended using composite images. To have cooperative team members is also a blessing, especially when I'm down with Chicken Pox. All of my team members, Rachel, Deon and Caris were not complaining, but rather, updated me with the latest comments from the presentation.

Even though I'm not equipped with Flash / Flash Catalyst knowledge, I'm blessed with a member who have that set of skills. So as to make myself useful, I could only rely on my photoshop skills to contribute to the project. I volunteered to create all the backgrounds for the project.

To brush up my photoshop skills, especially when the creation of believable backgrounds require a substantial amount of knowledge in blending, Rachel recommended a website where I can learn more.

http://psd.tutsplus.com/sessions/photoshop-basix/

It was very useful, and for once, I can create a rather well-blended background. I even learned how to create panorama and stitch various images together to create a single layout. Needless to say, I was proud of my work. =)

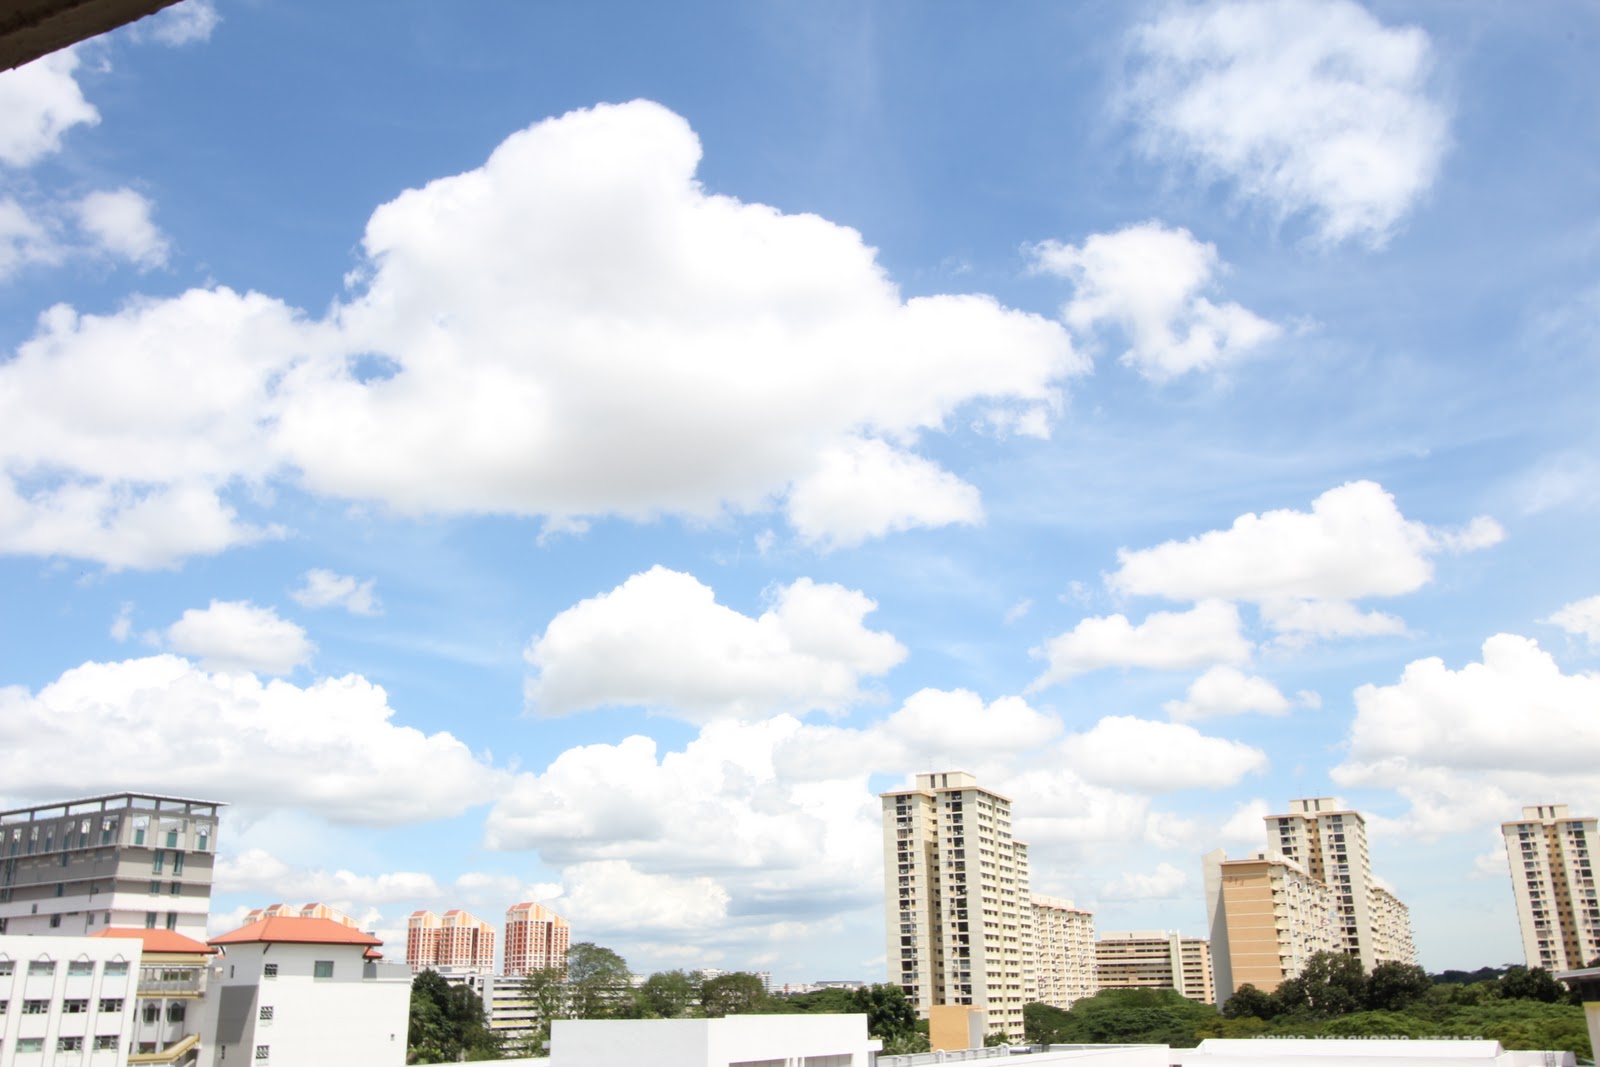
How various images are duplicated and blended together on Photoshop


Main tools I used for this: Colour Adjustments, Auto Blending (Select layers you want to blend, Edit > Auto-Blend layers. It's amazing. Doesn't work all the time though. But it's still fantastic) Masking etc. I'm so happy!

Final Image:

I'm still very lousy with painting shadows, burn and dodge tool though. That's why my table still look a little out of place. I tried adding shadows under "Effects" but it still didn't work much. My understanding of light is still bad. Gotta brush up on that.

I'm glad I get a chance to work on this.

Sunday, November 13, 2011

Assignment 1: Focus & Motion (Edited part 2)

Here are the other 2 sets of photos I've come up with to improve from the previous times I did.

Fast Shutter
I have done 4 different effects for it. But I'm not sure which is the best. Aye.
But I like the interaction between the flowers and the shadows. And every single flower is clear this time! =)


Shallow Depth of Field (SDOF)
Based on the previous comments, I've increased the contrast, but I'm not sure which version to go, a vintage, cosy feel, using a yellowish tinge, or a clear image, bringing out the essential colours from the flowers. 


I had fun doing this assignment. Really. 


Monday, November 7, 2011

Assignment 3: Urban Fantasy (Edited)

After the critique session, it has dawned on me that at least a quarter of the class took the apocalyptic approach to the topic Urban Fantasy. So much for me thinking that it's creative. So I thought of taking a literal approach of "Urban Fantasy". I've always associate fantasy with mythical creatures like fairies. So what could be better than to merge fairies to the cities we live in?

So I went to proceed to get some friends to help me out on this:

Original Images


Online Imageries


Developmental Process


Final Output

Urban Fantasy - Up in the clouds

Imagine a world where humans have wings. We are no longer restricted to the ground. We are allowed roam anywhere we want, including living up in the clouds. We can manipulate the weather, we can do anything we want in the sky. This is a urban culture we will live in, one that is carefree and unbounded. What a carefree lifestyle! 


Assignment 1: Focus & Motion (Edited)

I managed to take some images right before I got my chicken pox for my revisions on Assignment 1.

I went to reshoot to ensure I got the best images. 

Slow Shutter:
This time, I maximised my shutter time with a tripod. The light that was captured was more brilliant than the first time. Longer light rays were captured and the street lights looked like stars at night. It was beautiful.

F Number: 25
Exposure Time: 13"

I tried HDR, and I got the result as shown below. Somehow the image was not as amazing as individual shots, besides the fact more things are revealed. Since the focus of the image is the slow shutter, I guess bringing out other elements in HDR (such as the buildings) is not important. But it was a fun attempt still, given I've never played with HDR before. 

F Number: 25
Exposure Time: 13"


 Deep Depth of Field (DDOF)

Taking note to bring out all foreground, mid-ground and background, I took the opportunity during a "photoshoot" with my friends to try out. As compared to my first attempt of capturing DDOF (shelter in the reservoir), I believe this is a better representation of DDOF, where all different depths are clear. Kudos to my friends who are willing to be my models!

F Number: 22
Exposure time: 1/13


I'll try to improve on other images when I have the time!


Sunday, November 6, 2011

Assignment 3: Urban Fantasy

For this assignment, I decided to take on an apocalyptic stand when it comes to urban fantasy.


Original Images


Online Imageries


Developmental Process


Final Output

Urban Fantasy- Apocalypse

What happens to a beautiful cityscape if we do not take good care of it? Excessive consumption of natural resources such as oil, coupled together with humans-mediated activities like war and starvation, nothing bodes well for the humankind. A juxtaposition of what might happen in the future against the current serene city is used to warn us to take immediate actions now, or else suffer dire consequences.


The second image (right) was created (tweaked) after receiving comments that the positions of the 3 symbolic images are too "safe" in terms of positions, and that I need to improve on the transparencies as well.

Sunday, October 9, 2011

Tutorial 3: Photoshop techniques

I didn't attend the tutorial this week because I was involved in this:


That being said, I managed to learn a tip or two after lecture from Shane, our damn-zai classmate, where he shared with us the technique on masking.

To put things simply, (in my own words and interpretation)
Masking = non destructive way of editing of images. Goes hand in hand with blending.

And the "refine edges" in CS5, works miracles and speed up the selection process!

Last but not least, I learned about the "clone" stamp in Adobe Lightroom (no doubt it's not photoshop, but still!), where it covers blemishes better than in Photoshop! 'Cause it automatically copies the area around the spot, unlike photoshop where you manually select the area to copy. Goodbye pimples! 

I shall put these into good use into my next assignment (esp. masking!)

Peace out!