Sunday, September 25, 2011

Tutorial 2: Mobile Art


Tutorial 2 requires us to think hard about what is so special about the handy tool we always carry around us- our mobile phone.

Theme of the tutorial: Find the extraordinary among the ordinary.

And so the journey begins:


I liked the final photo because of the irony between cigarettes and a no smoking campus.To some people, such photos might be meaningless, but mobile art is akin to presenting personal experience on photographs.Ending quote: The best camera is the one you have with you.

Sunday, September 18, 2011

Assignment 1: Focus & Motion

I was thrilled when I received this assignment. It was simple: To produce a minimum of 4 pictures that feature 1) Shallow Depth of Field (DOF), Deep DOF, Freeze, Blur Motion and Panning (Optional). No restrictions of subject/ themes so long they fulfill the technical requirements.

The moment I managed to borrow a DSLR from the school, I went away snapping. Lionel was right. The best way to gain experience in photography is to take more photos with the DSLR. Through this assignment, I understood a little more on tweaking aperture, shutter speed and ISO settings to achieve a balance in the exposure triangle.

Device Model: Canon EOS 550D

Shallow DOF

F number: 5.6
Exposure Time: 1/500

I liked the photo above because of how "lonely" the pallet felt against the background. The light and shadow, together with the "bokeh-ed" sink at the back makes it rather surreal. I was worried that the subject might not be interesting as compared to the rest, therefore I didn't pick it for the presentation.


F number: 5.6
Exposure Time: 1/320

The photo featured a brooch on top of my mum's sewing machine. It was a time when the evening sun shone beautifully on the machine and I just had take photos with it.  I like how light and shadows interact with each other in photos. I added a little brown in the photo to create a more vintage look. Nonetheless during the critique session, comments shared are that the metals at the background somehow distracts the subjects, rendering the image less aesthetically pleasing.  


F number: 5.6
Exposure Time: 1/1000


This was the photo that was chosen in consensus when I asked the class which is better. I liked this image because of how both the foreground and background are blurred, leaving just 1 flower in the middle to stand out. Jing pointed out that the colour contrast might not be enough. Perhaps the yellow filter might not be good enough. I'll try again then.

Deep DOF

F number: 22
Exposure time: 2"

Initially, to me, an typical image that has Deep DOF is the cityscape of Singapore. Every detail is captued, and the buildings, even though they are far, can still be seen very clearly. I didn't have the time to take something like that. I was in Macritchie Resevoire chasing after the sun hoping to get a very nice sunset shot. The more I take the more I realise that this can only be a wide-angle photo. Jing pointed out that an effective Deep DOF photo makes the foreground, midground and background clear at the same. Hence my photos need to have all 3 elements in order to highlight the Deep DOF-ness. Thus, even though some of my classmates liked this photo, it doesn't really answer to the requirement of the assignment.

Blur Motion

Thing to note: It's best to shoot with a tripod for blur Motion pictures. Because of the slow shutter speed, the background might be blurred even if there is a small movement with your hands. I tried so hard to get my hands steady while shooting for these photos because I didn't borrow tripods. It was really a tough time.


F number: 9
Exposure Time: 6"


I took this image to juxtapose the roads with the neighbourhood. The comments given were that they prefer the image below as it focus more on the blur motion contributed by the cars. This image would be good if the theme is on neighbourhood. It's all about answering the requirement.


F number: 5.6
Exposure Time: 6"

Original photo
Edited photo
To focus more on the blur motion by the cars, I cropped the plants away and adjust the colours to bring out the contrast. Perhaps too much contrast makes the over-exposure even more obvious. 

Freeze Shots

F Number: 9
Exposure time: 1/4000

F Number: 9
Exposure time: 1/4000
F Number: 5.6
Exposure time: 1/1000


F Number: 9
Exposure Time: 1/4000

The difficulty about taking these shots is how you can freeze an action that happens so fast. I could only get about 30 usable shots out of the 1000 continuous frames I shot. And 4 decent shots out of the pile. I chose the final one for critique session, and it seems that the consensus was the background was blur because it was out of focus, rather than having the bokeh effect. Maybe if everything is blur except for the middle flower the bokeh effect will be more convincing. We acknowledged that keeping these in focus are difficult because we cannot control the movement of these petals. Instead of throwing upwards, some suggested dropping it down, but the effect was not what I wanted (as shown in the first 2 photos). I couldn't understand when some suggested dropping it and tilt the camera upside now- wouldn't the effect be the same as taking it the right way and tilt it 180 degrees in photoshop? One suggested to simply increase the deep of field, so that i can capture every detail. I suppose that sounds feasible, and I'm going to try that. 

All in all, this assignment really helped in getting myself familiarised with the DSLR. And I'm very proud of my experiences with the camera. Hope this will sharpen my skills in the future!

p.s. I'll try shooting people from the front!

Friday, September 9, 2011

The Beginning of a DSLR-student

It's pretty amazing still, as I looked back at just 2 weeks ago when Lionel came over to NM3223 class and gave an intro lecture on DSLR. I must thank my friend CJ for lending me his precious DSLR for that lecture so that I could have some hands-on practice. And of course Lionel for his lenses and his wonderful tips.

Being a person with no prior experience with DSLRs, it was a bit of challenge to understand the relationship between aperture, shutter speed and ISO. With this funnel embedded in my mind, we had a little practice outside the class:

Jing was describing that Panning shot works when you follow your camera along with the subject as you take your shot. This makes the subject clear while the background becomes blur. This helps to add another dimension of movement to the photo. The best angle is to take the side profile, as this allows maximum distance to pan.

And Lionel added that it's wise to switch of the image stabiliser to achiever a better panning shot.

Shallow Depth of field (SODF): I always love how people looked so beautiful with the background being blurred out. Now that I've found out that the aperture is the main component you should work with for SODF. And Lionel was kind enough to lend me his lens that allows me to achieve an aperture of 1.4!

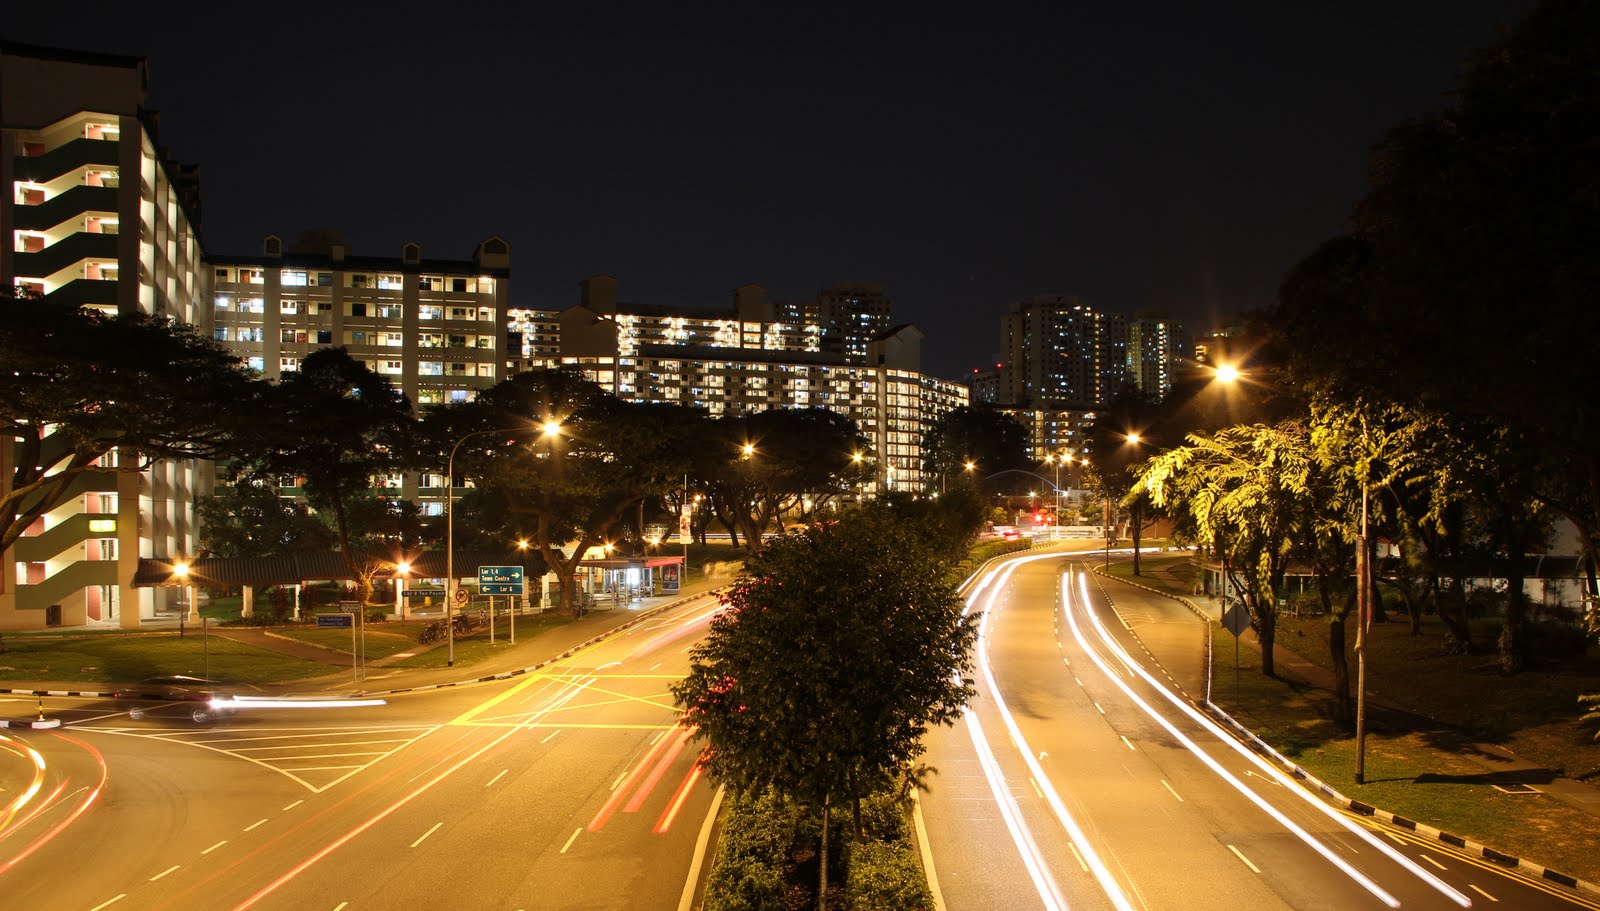
Worried that I didn't grasp the technique of DSLR, I went to attend another photography workshop organised by Natstudios in NUS. He taught us how to hold a DLSR properly, the standing positions etc. And his photos somewhat inspired me to take a photo for my assignment 1. =)

I was with my friend, and I had the previlege to try my shots and show how the SODF works (foreground clear background blur instead of the reverse for the previous SODF shot). The colour was a little wierd, maybe it has got to do with the white balance. But I adore how the the background blurred, creating shimmering effect.

That marks the initial contact with a DSLR. And things are going to be more exciting!

- Jo the aspiring photographer